Sign Up and Sign In to SelPage
New accounts begin with email verification. After that, choose an optional password, complete your profile, and select a plan. Returning users can sign in with an email code or an existing password.
Last reviewed: 11 October 2026.
The screenshots below show the current forms with example account details. Enter your own information when following the steps.
1. Create Your Account and Verify Your Email
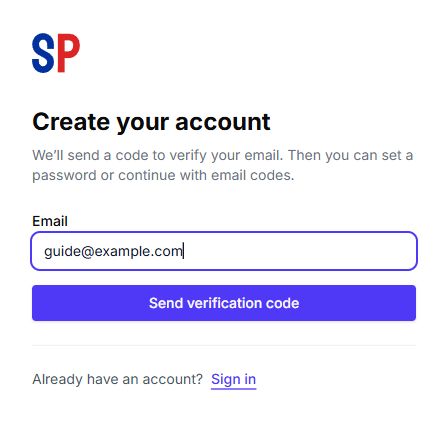
- Open Sign in and select Create an account.
- Enter your email address and select Send verification code.
- Check your inbox for the six-digit code. Enter it in Verification code and select Verify email and continue.
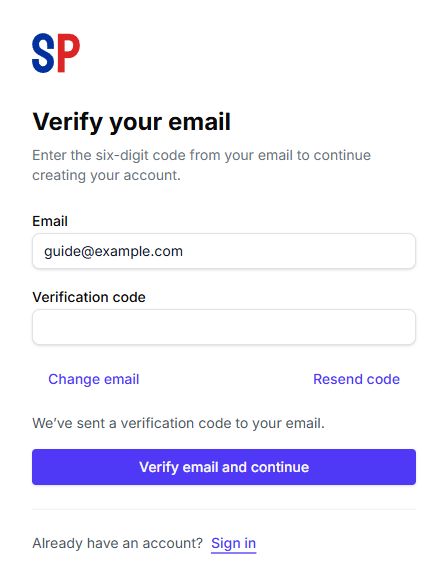
Use Change email if you entered the wrong address. Use Resend code if needed; wait one minute between requests. That wait is the resend interval, rather than the lifetime of the code.
2. Choose How to Sign In
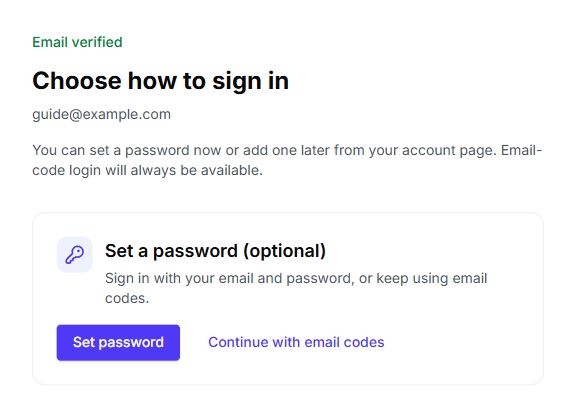
After verification, the Choose how to sign in screen offers two paths:
- Set password: enter and confirm a password, then select Save password and continue. Use at least 12 characters, including uppercase and lowercase letters, a number, and a symbol.
- Continue with email codes: finish setup without a password. You can add one later from your profile.
Email-code login remains available even when you have a password.
3. Complete Your Profile
Complete the account information form and select Submit.
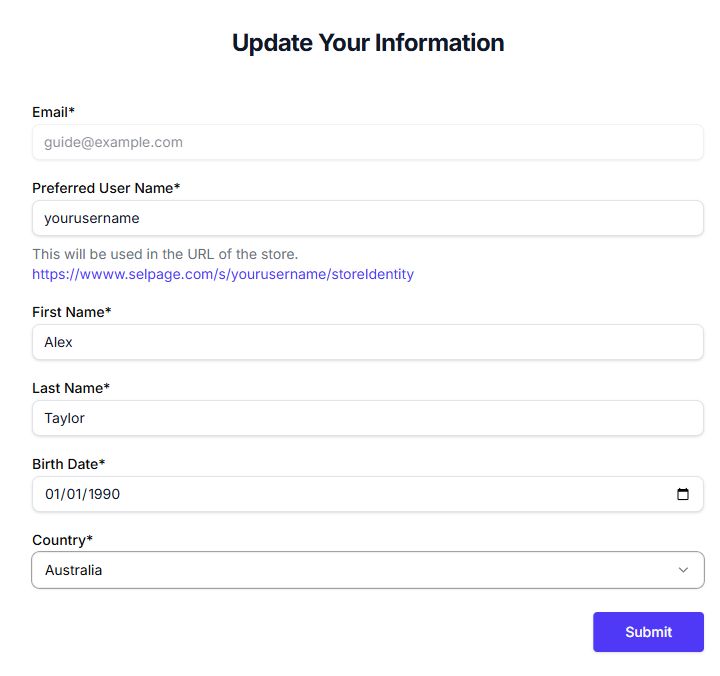
| Field | What to enter |
|---|---|
| Your verified email is prefilled and cannot be changed in this form. | |
| Preferred User Name | At least five characters, starting with an English letter. Use letters, numbers, underscores, or hyphens. Check the availability message. |
| First Name and Last Name | Your account name. |
| Birth Date | You must be at least 18 years old. |
| Country | Select your country. |
Your username appears in public store addresses, such as https://www.selpage.com/s/your-username/your-store. After signup, open Profile to update your details with Save profile and manage your password.
4. Choose Your Plan and Open the Dashboard
Review the plans offered during setup. Compare the store allowance, products per store, visit allowance, price, and billing duration. Check any trial terms and payment requirements displayed in checkout before confirming.
Use Pricing for a public comparison and Choose and Manage Your Plan for the account workflow. Once setup is complete, continue to Dashboard and build your first store.
5. Sign In, Recover Access, and Log Out
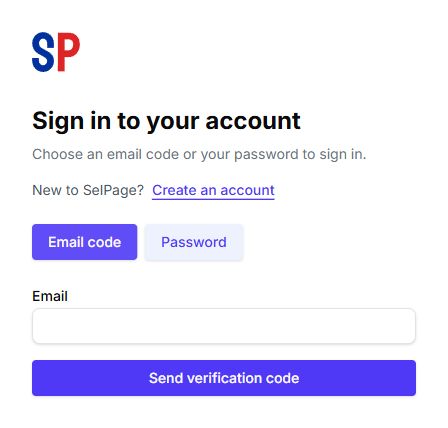
- Email code: select Email code, enter your email, select Send verification code, enter the code, and select Sign in.
- Password: select Password, enter your email and password, and select Sign in.
- Forgot password? use the recovery form to request an email recovery code, choose and confirm a new password, then sign in again.
- Log out: open the user menu at the bottom of the dashboard sidebar and select Log out.
If a code does not arrive, check your spam folder and verify the email address before requesting another. Follow any error shown by the form. If account loading fails during setup, use Try again.